
義大利模型卡車: MAN TGX XXL V8完成 [ MAN TGX XXL V8 project completed ]
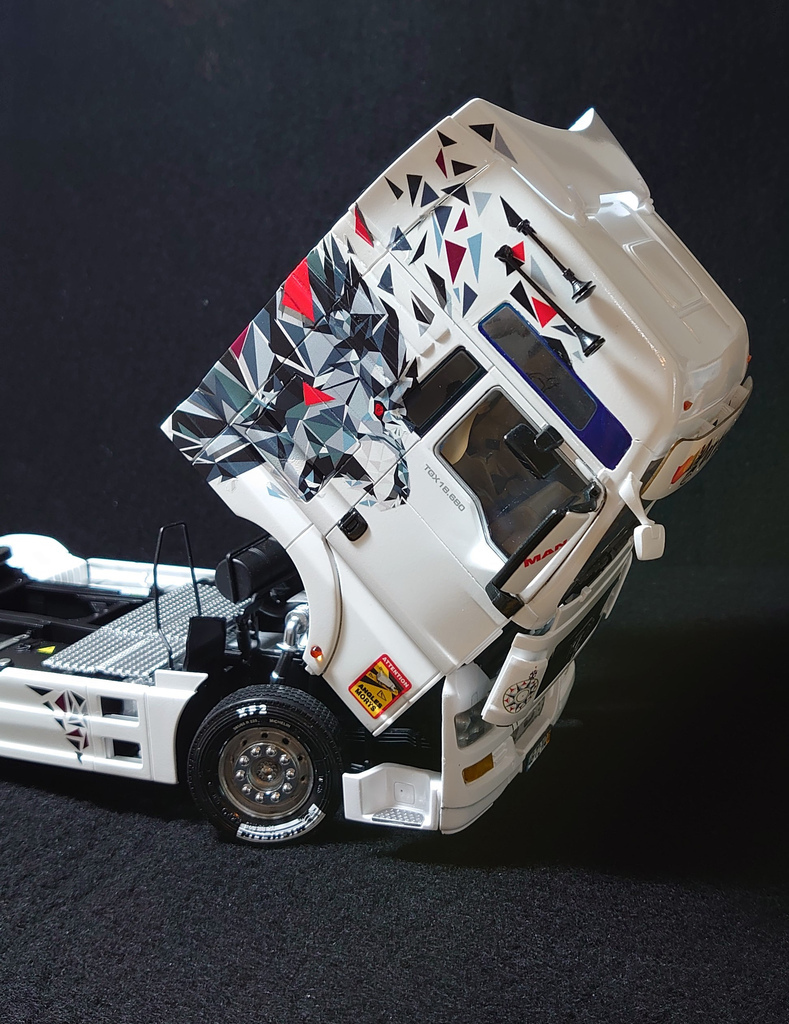
上次挑戰DAF XF 安裝引擎和方向機旋轉結構,雖然主體已經完成,缺少了自製吊車用的吊臂,所以一直沒發表;這一次不但挑戰安裝引擎和方向機架構,多了可以將車頭前掀的功能。
[ Last time, I took on the challenge of installing the engine and steering mechanism on the DAF XF. While the main body has been completed, I was missing the self-made crane arm for the towing truck, so I haven't published it yet. This time, not only did I challenge myself to install the engine and steering mechanism, but also added the functionality of lifting the front of the truck. ]

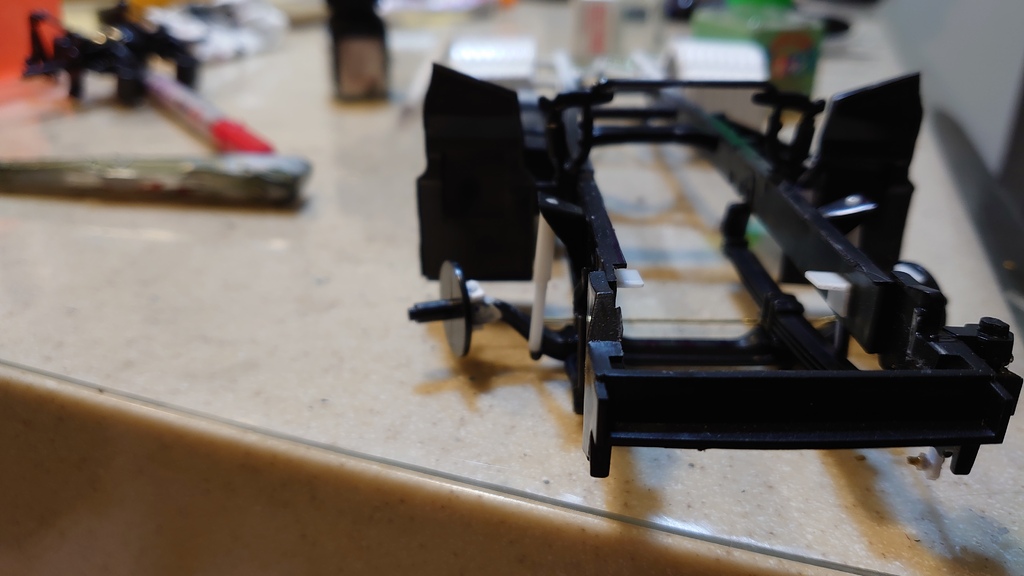
DAF那台沒發表過,這次就拿這台模型來詮釋方向機如何自製,將其轉動。已經知道這種無引擎的模型產品是前輪沒有轉向的,花了將近1千1新台幣連轉向功能還被剝奪![]() 因此恢復方向機的方法就顯得重要。首先切開25A零件前輪剎車盤與工字樑斷開,由於是直面劈開,因此還需將假的轉向機構切除後鑽孔,再安裝自製的轉向零件去結合,如上圖,藍色箭頭是3mm空心棒用AB補土加強固定,上下兩片轉向零件用3D列印印出;由於自制轉向機構,前輪避震器切除重新製作新的避震器,轉向機構盡量接近如下圖設計方式。車頭的輪拱板移除,與車廂下層作黏合,製作後半段才要做黏合處理。
因此恢復方向機的方法就顯得重要。首先切開25A零件前輪剎車盤與工字樑斷開,由於是直面劈開,因此還需將假的轉向機構切除後鑽孔,再安裝自製的轉向零件去結合,如上圖,藍色箭頭是3mm空心棒用AB補土加強固定,上下兩片轉向零件用3D列印印出;由於自制轉向機構,前輪避震器切除重新製作新的避震器,轉向機構盡量接近如下圖設計方式。車頭的輪拱板移除,與車廂下層作黏合,製作後半段才要做黏合處理。
[ The DAF model that hasn't been published before will be used this time to demonstrate how the steering mechanism is self-made and how it rotates. It is already known that this type of engine-less model product lacks steering capability in the front wheels. :(
Therefore, the method of restoring the steering mechanism becomes crucial. Firstly, cut open the 25A part, disconnecting the front brake disc and the I-beam. Since it is a straight split, the fake steering mechanism needs to be cut and drilled before installing the self-made steering components to combine them as shown in the picture. The blue arrow indicates the reinforcement using 3mm hollow rods and AB epoxy putty for fixing. The upper and lower steering components are 3D printed. Due to the homemade steering mechanism, the front shock absorbers are removed and new ones are remade to resemble the design shown in the image below as closely as possible. The front wheel arches are removed and bonded to the lower part of the cabin. The bonding process is done only for the latter half of the model. ]

剎車分泵可以不做,說實在平常看不到這個小零件。9A這個是轉向機構其中一環,這部份很好處理。由於沒引擎設計,因此需要5mm L角板製成了引擎固定的地方(引擎腳固定處)。
[ The brake master cylinder pump can be skipped since it is a small part that is not easily visible in regular circumstances. The 9A component is one of the parts of the steering mechanism and can be handled easily. Due to the original design without an engine, a 5mm L angle plate is used to create a place to securely fix the engine.]
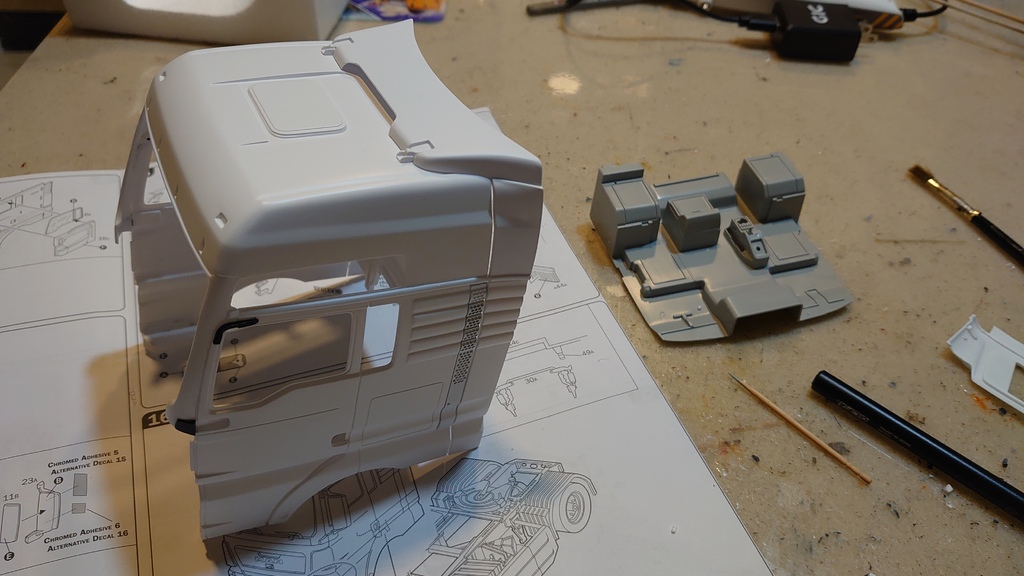
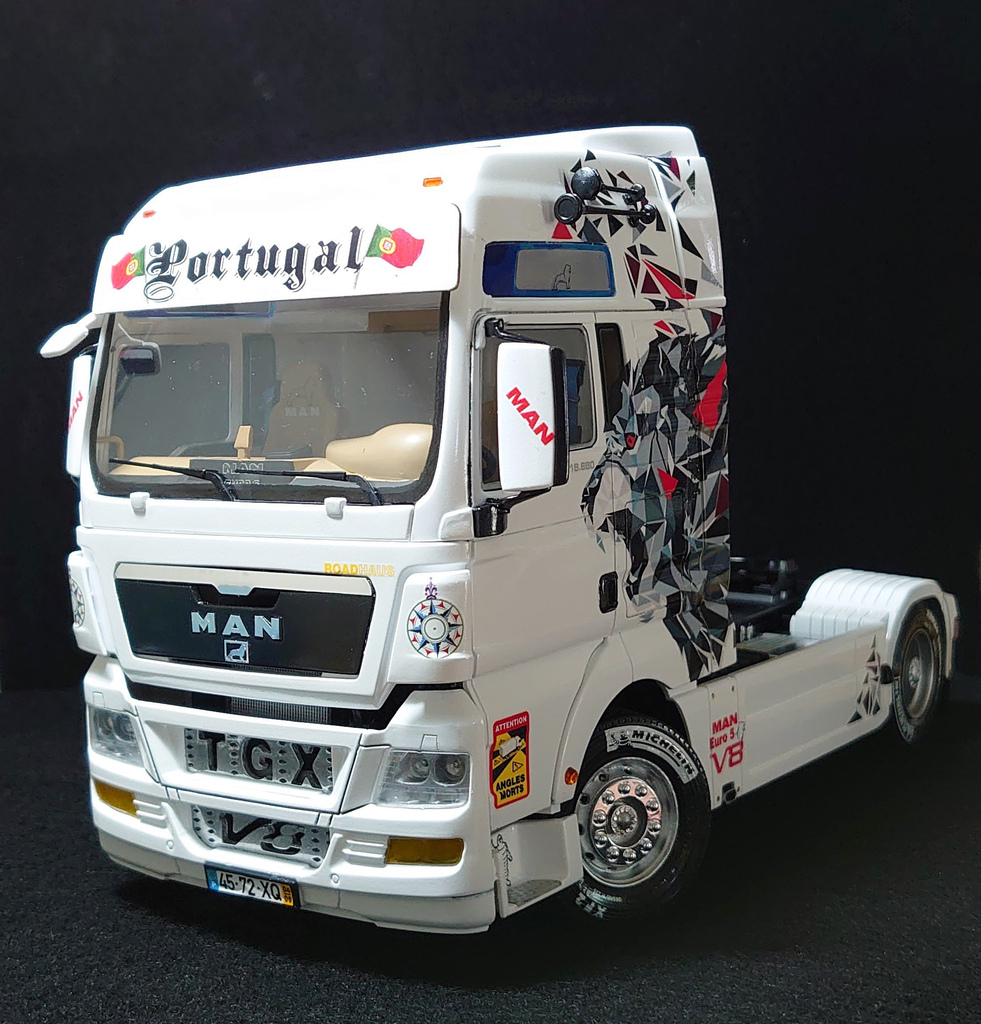
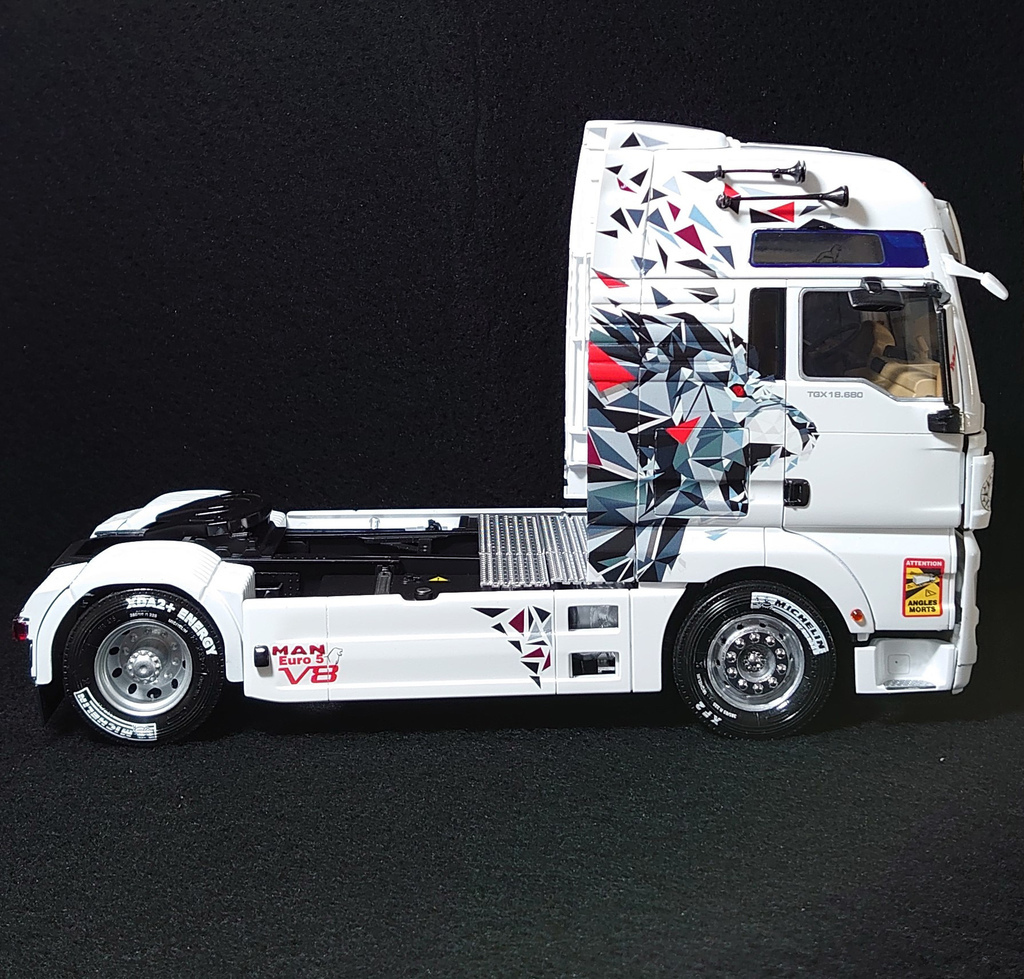
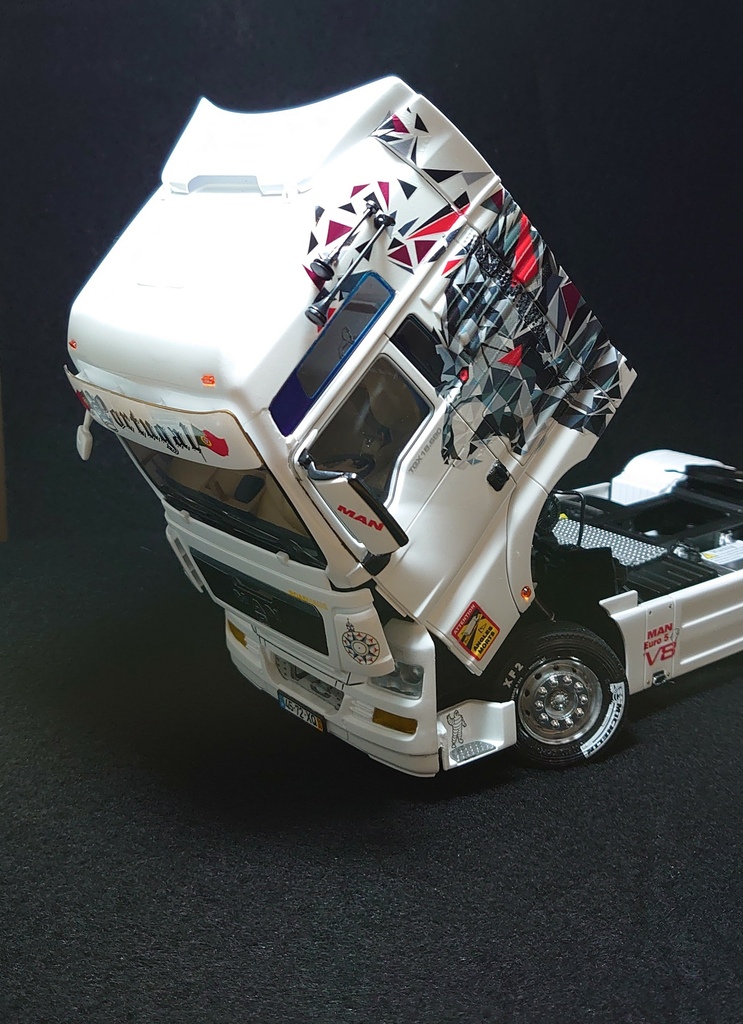
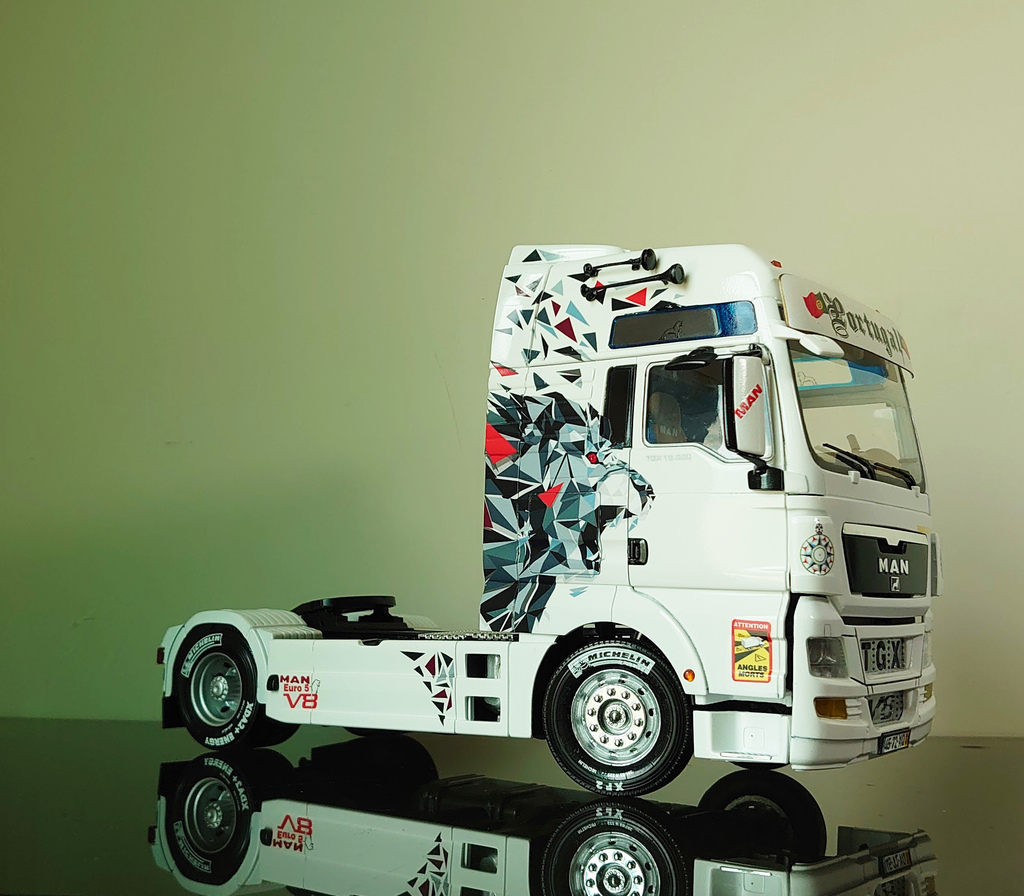
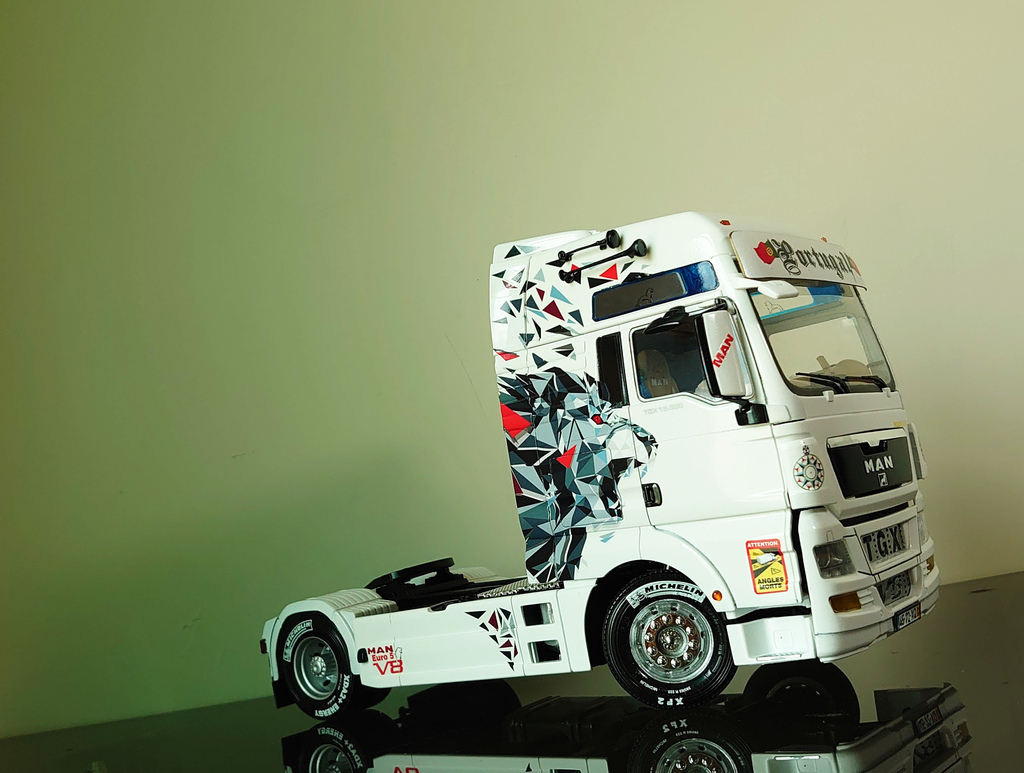
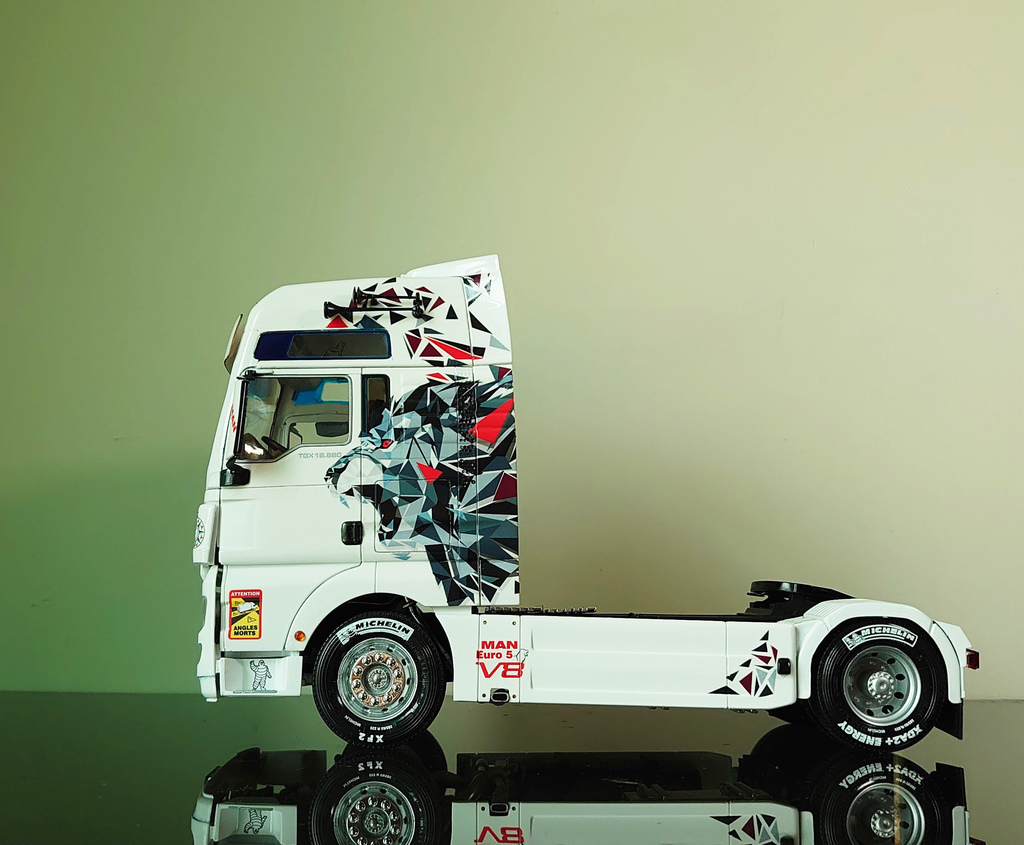
這一次挑戰掀車頭的功能,車頭安裝方式不能照說明書方式進行,DAF那台雖沒發表但是也有做掀車頭,但是失敗收場。車頭三個立面先將黏合起來,貼完水貼噴上亮光漆,拋光研磨後,再把兩側玻璃和內裝塞進去。水貼沒有用ITALERI 的狼群水貼,而是採用2017年發表的概念車廂繪圖,就是隔年用在Lion500Edition車頭獅頭繪圖。由於彩繪獅頭只找到1/64和1/50的水貼,實在沒辦法只好發揮美術天分用Illustrator繪製,找人列印水貼。
[ This time, the challenge includes the functionality of lifting the front of the truck. The installation method for the front of the truck cannot follow the instructions provided. Although the DAF truck has not been published yet, attempts were made to lift the front of the truck, but it ended in failure. The three sides of the front of the truck are first glued together, then stickers are applied and sprayed with glossy paint. After polishing and sanding, the side windows and interior are inserted. Instead of using the ITALERI WOLF TRANSPORTE stickers, a drawing of the concept cabin from 2017 was used, which was later used for the front design of the Lion500Edition the following year. Since only 1/64 and 1/50 scale stickers of the painted lion head were available, it was not possible to find suitable ones. As a result, artistic skills were put to use, and the stickers were designed using Illustrator and printed by my friend. ]

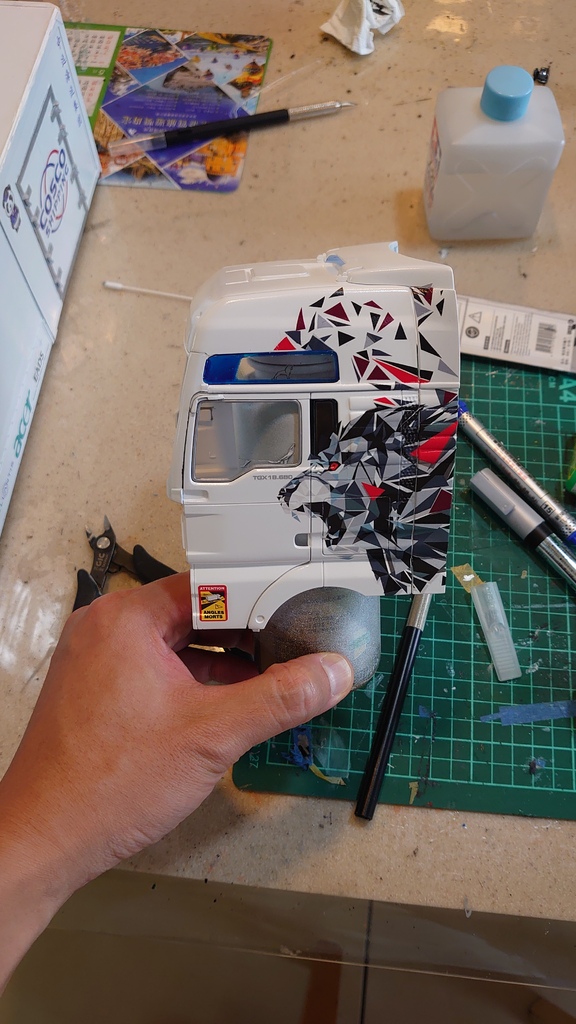
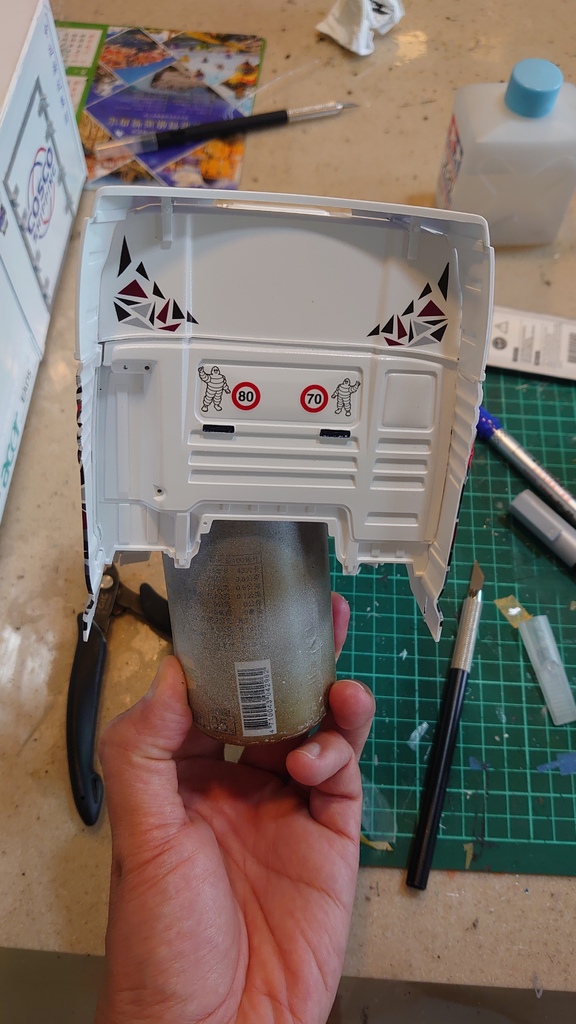
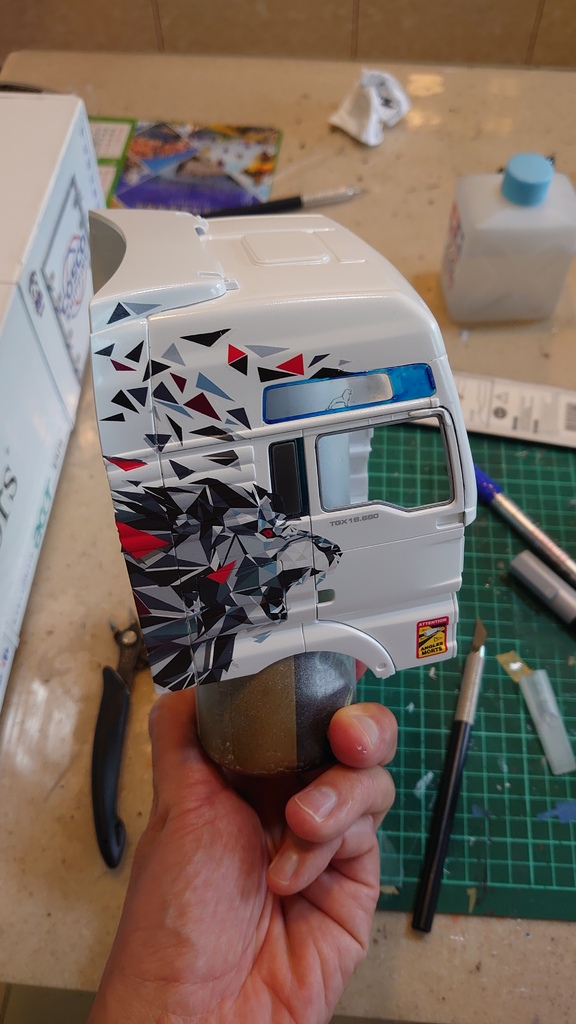
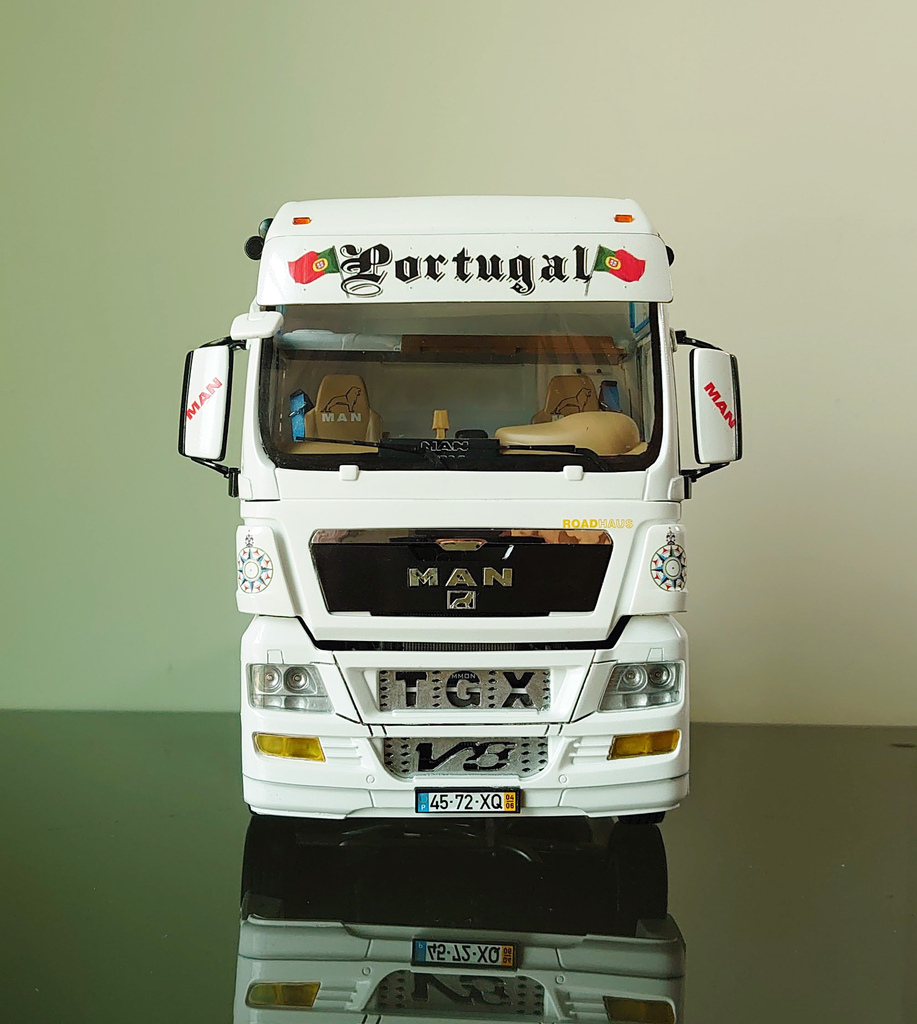
左右兩邊的水貼碎片水貼貼得稍微有點不同,與其說故意不如說車頭設計本來就不對稱,就連車側的護板也是,所以碎片水貼想貼怎麼就怎麼貼。這次主題是葡萄牙,雖說葡萄牙代表色好像是紅色,但為了凸顯彩繪獅,就選用白色為主色。
[ The stickers on the left and right sides may appear slightly different, but it is not so much intentional as it is due to the asymmetrical design of the front of the truck. Even the side partitions are asymmetrical. Therefore, the fragmented stickers can be applied however my prefer. The theme for this time is Portugal. Although the representative color of Portugal seems to be red, white was chosen as the main color to highlight the painted lions. ]

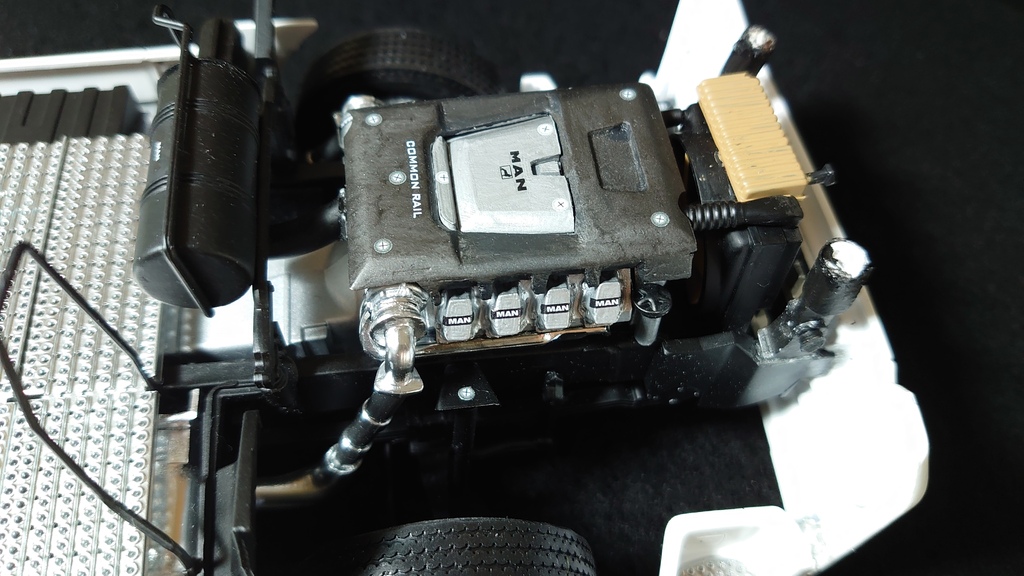
引擎的部分直接用另外一台ITALERI模型 MERCEDES-BENZ SK EUROCAB 6x4這一組,因為這台模型居然多"贈送"一台完整V8引擎。TGX V8 引擎是D2868 ,這款引擎中間是用引擎保護蓋蓋住,因此減少了V8中間空出來的線路,但也由於直接使用MERCEDES V8 引擎,沒注意冷卻系統位置與MAN 相反的,MAN是左進右出,MERCEDES是右進左出,這點要掀車頭才會知道,不然很難注意到這部分出錯了。
[ For the engine part, I decided to use another ITALERI model, the MERCEDES-BENZ SK EUROCAB 6x4, because EUROCAB model "gift" a complete V8 engine. The TGX V8 engine, which is the D2868, has the engine cover in the middle, which covers up the exposed lines in the middle of the V8 engine. However, I using the MERCEDES V8 engine directly, you didn't notice that the cooling system position is opposite to that of MAN. MAN has the coolant inlet on the left and outlet on the right, while MERCEDES has it on the right inlet and left outlet. This detail would only be noticeable when lifting the front of the truck, otherwise, it would be difficult to realize this mistake.]

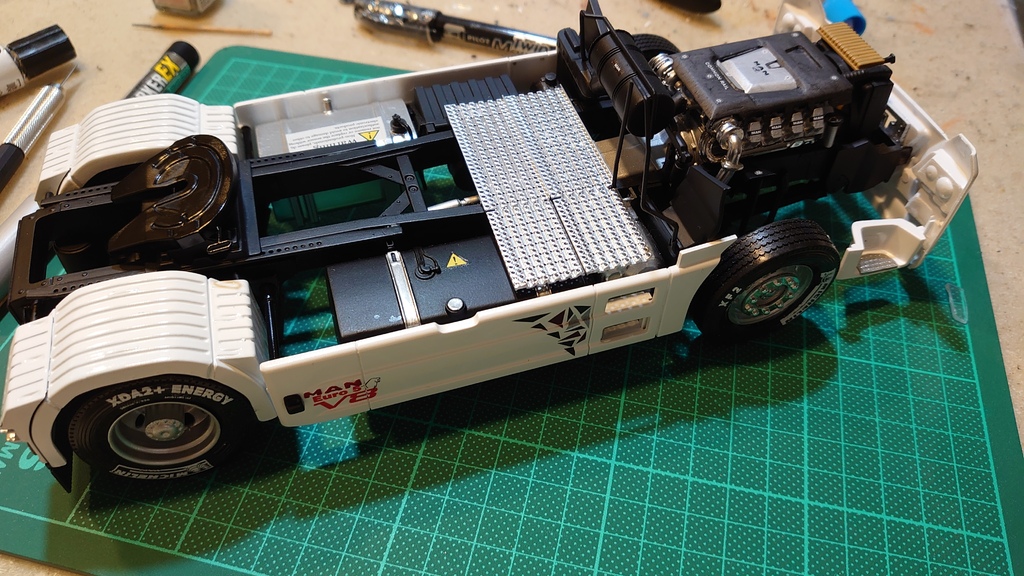
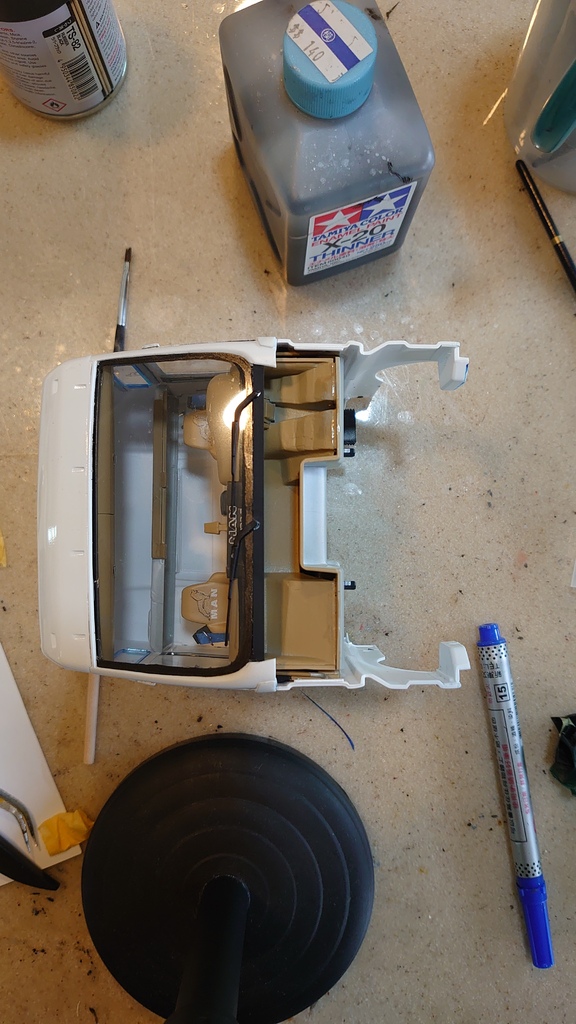
由於前擋風玻璃已經變形了,因此花了非常長的時間重新製作透明零件。掀車頭的關節組好黏在底盤上,"AIR包"與車廂先鑽孔再關節組黏合,鑽孔是要放進1mm銅棒,是為了強化車廂與"AIR包"之間的結合。
[ Due to the deformation of the front windshield transparent piece, it took a considerable amount of time to remake the transparent parts. The joints for lifting the front of the truck were carefully assembled and glued onto the chassis. The air cushion and the cabin were first drilled, and then the joints were assembled and glued. The purpose of drilling was to insert 1mm copper rods to strengthen the connection between the cabin and the air cushion. ]

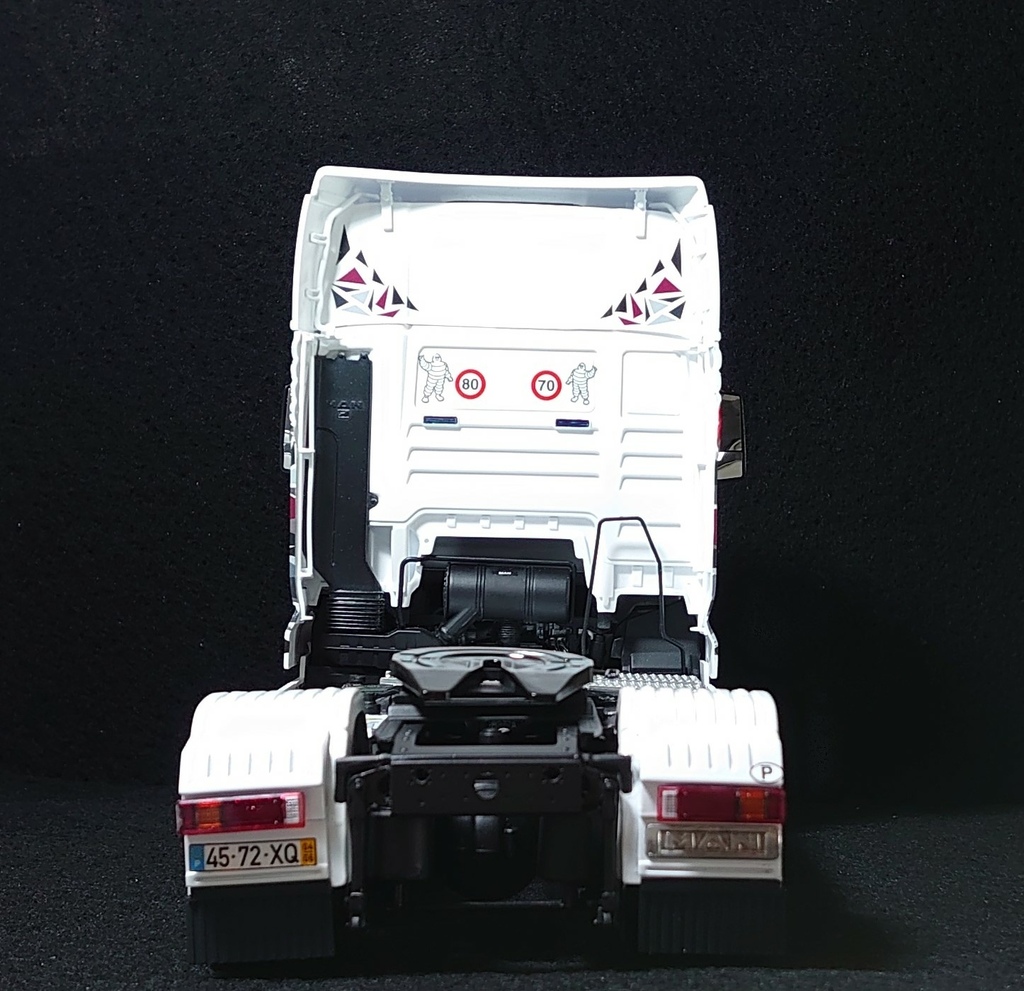
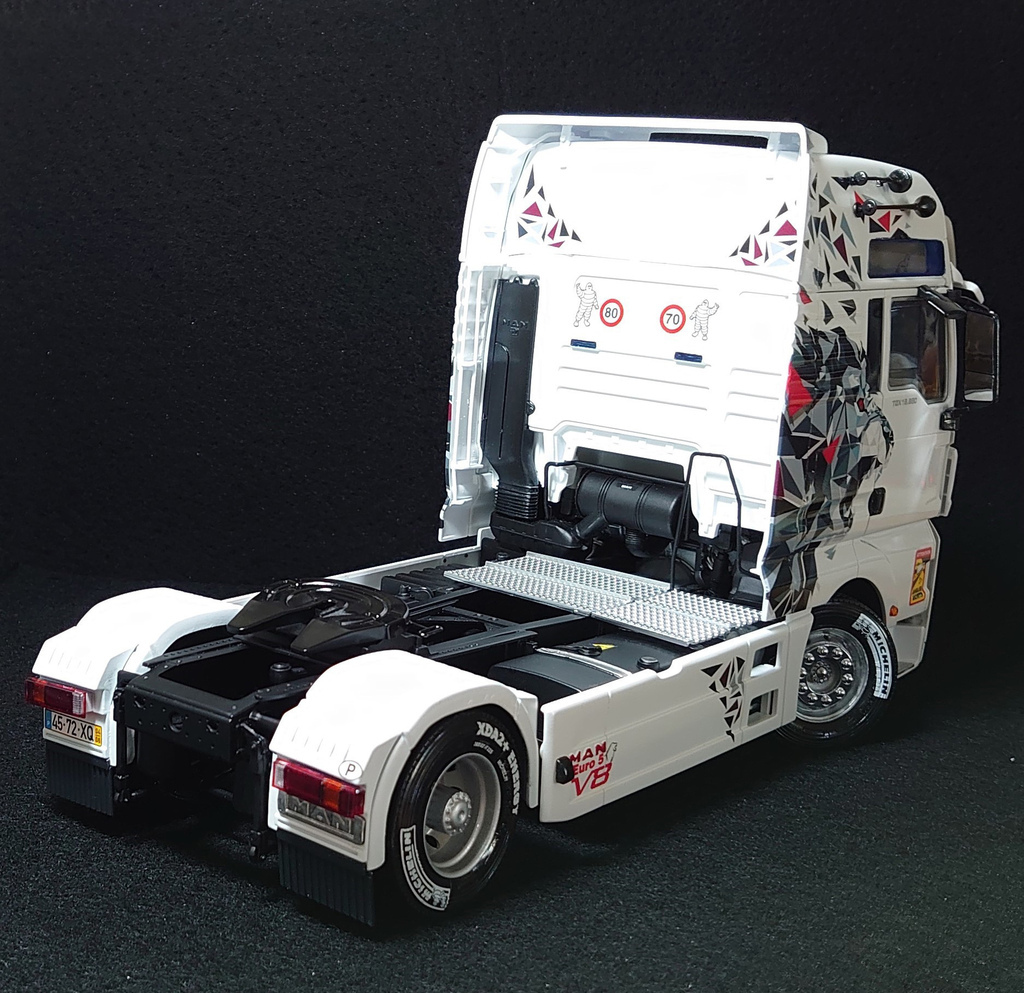
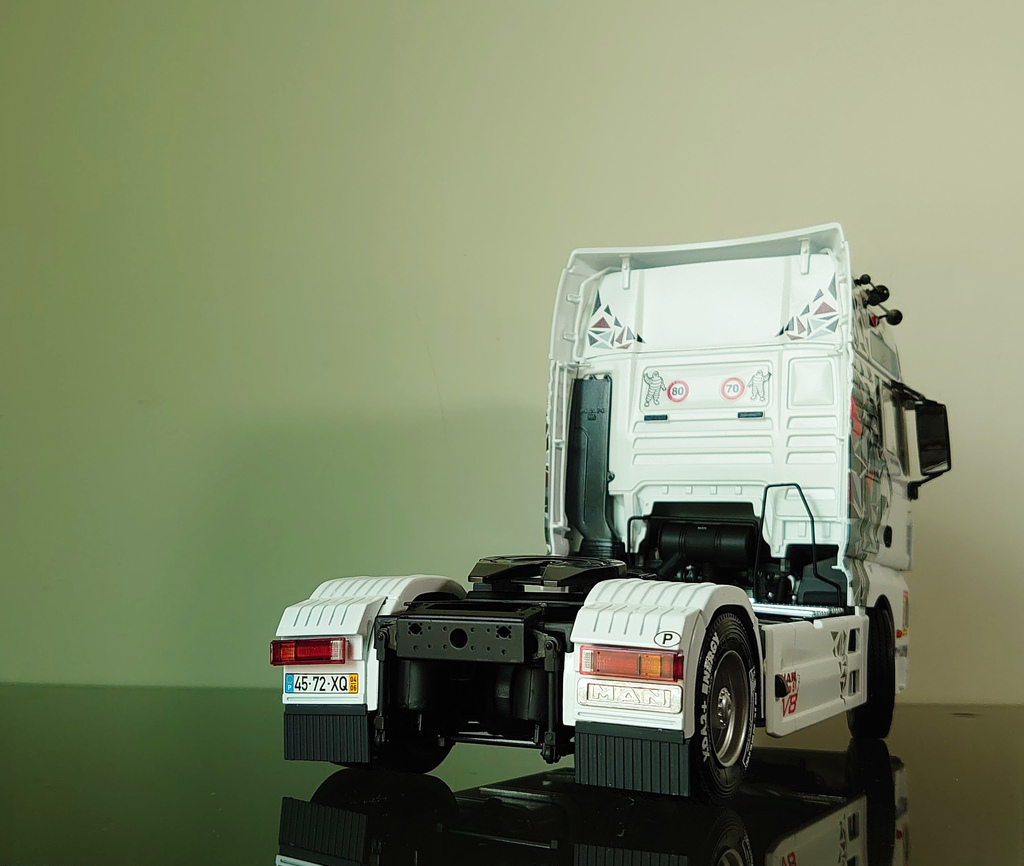
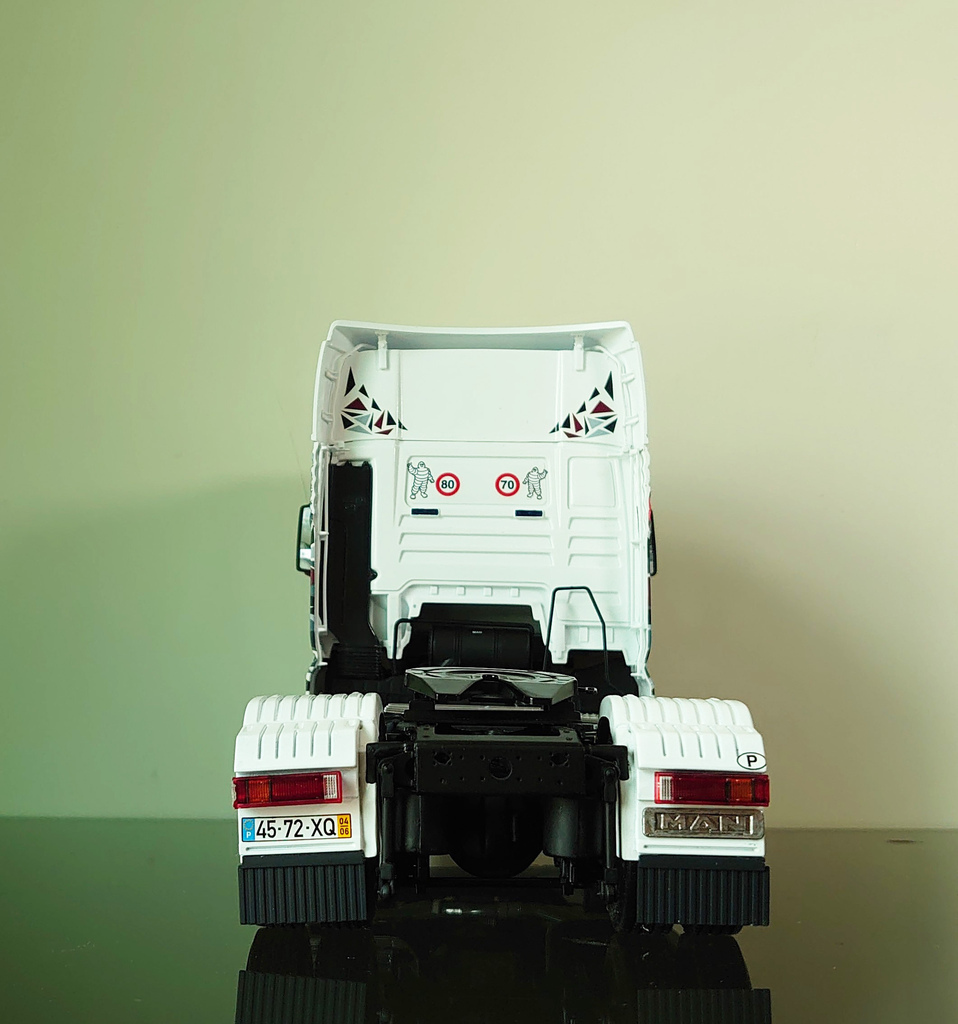
細節部分:雖說從渦輪吸氣過濾到岐管這一段好像是做錯的,但是沒資料也找不到沒圖片佐證只能將就。排氣部分,3D列印廢氣觸媒槽但被工作板擋住看不到了,尿素桶也是用3D列印。V8版本排氣管是在左側,所以左側護板挖出3.5mm寬和高3mm 的洞。備胎移除,安裝650公升油箱。車頭正面裝不銹鋼裝飾板,也是3D列印代勞。
[ Regarding the details:
Although it seems that there might be an error in the section from the turbo air intake filter to the exhaust manifold, it is difficult to find information or supporting images to confirm. For the exhaust part, a 3D printed exhaust catalyst chamber was used, but it is not visible due to being blocked by the workbench. The urea tank was also 3D printed. In the V8 version, the exhaust pipes are on the left side, so holes measuring 3.5mm in width and 3mm in height were made in the left side fender. The spare tire was removed and a 650-liter fuel tank was installed. A stainless steel decorative plate was 3D printed for the front of the truck.]
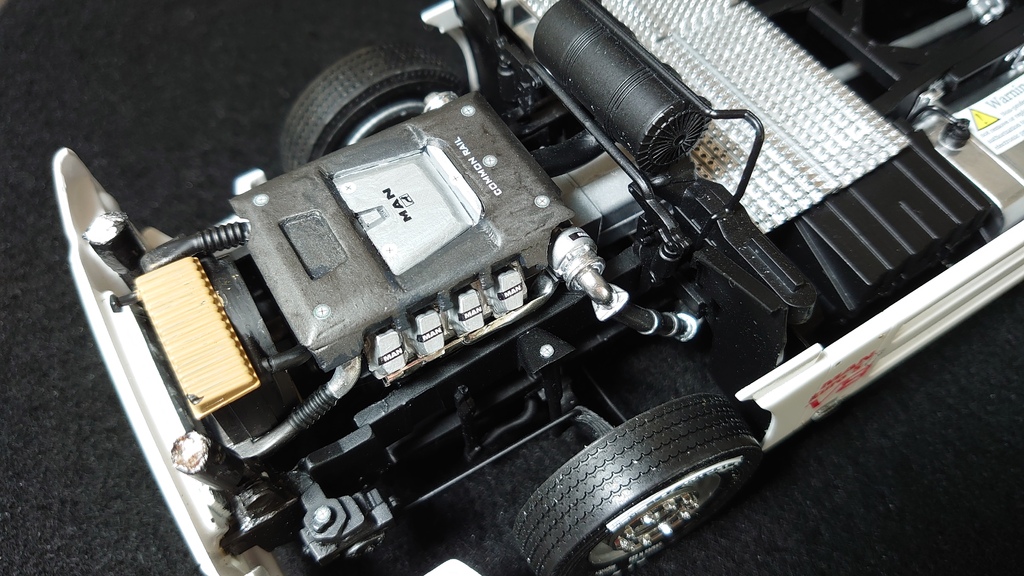
歷時2個多月的奮鬥,終於把MAN TGX XXL V8 完成了 ,感謝來我的部落格參觀,後續還有一台 MERCEDES-BENZ SK EUROCAB 6x4模型卡車製作,它很有可能是最後一台卡車模型製作了。感謝參觀以下分享照片。
[ Congratulations on completing the MAN TGX XXL V8 model after more than two months of hard work! Thank you for inviting visitors to my blog to see the progress. It's exciting to hear that there is another model truck, the MERCEDES-BENZ SK EUROCAB 6x4, in the works. It may potentially be I final truck model project.
Thank you for sharing the photos below. BYB~ ]










 留言列表
留言列表


